PixAI Image-to-Video Tutorial: Model Guide + Prompt Writing
Image-to-Video (i2v)is easily one of the most popular and rewarding features in the PixAI toolkit. It’s the magic button that breathes life into your static creations. But there’s a big difference between just “using” it and truly mastering it.
To get professional-grade results, you need to know which model excels at what, how to dial in your settings, and how to frame your prompts for maximum control. Whether you’re a seasoned creator or just starting out, consider this your “Evergreen Manual” for I2V.
Table of Contents
The Interface: Know Your Tools
When you open Video from the top navigation, you’ll land on the Image-to-Video workspace. The layout is clean and streamlined — your generated results fill the space above, while everything you need to create them lives in one unified bar at the bottom.

The Prompt Bar: Your Creative Command Center
At the heart of the interface is the prompt bar, which brings image uploads and prompt writing together in one clean row.
Start Frame & End Frame (Optional)
On the left side of the prompt bar, you’ll see two upload slots connected by an arrow:
- Start Frame — The image your video begins with.
- End Frame (Optional) — The image your video ends on. Leave it empty if you only want to animate from a single starting point.

Pro Tip: The Start/End Frame Strategy
Most of our models support both a Start Frame and an End Frame. Instead of just letting the AI “guess” where to go, you can upload Image A as the beginning and Image B as the finish line. The model will then calculate the smoothest transition between the two. This is a game-changer if you have a specific character pose or composition in mind for the final shot.
The Prompt Box
To the right of the upload slots is where you describe what you want to happen on screen. A good prompt includes subject, movement, and environment — we’ll break this down in detail later.
The Control Bar: Where You Shape Your Output
Directly below the prompt bar sits a horizontal row of settings that control how your video gets generated.
💡 Before we dive in: The settings covered here are the core options you’ll see across all models. Many models also come with their own unique settings that unlock specialized capabilities. We’ll introduce those alongside each model in the next section, so you’ll know exactly what each one brings to the table.

Model Selector
The leftmost button shows your currently selected model (e.g., V4.0 Preview). Click it to open the full model picker and browse all available options.

At the top of the picker, you’ll see two tabs — Basic and Professional — which let you switch generation modes:
- Basic — Faster generation and lower credit cost. Perfect for quick drafts and testing ideas.
- Professional — Higher fidelity, more refined movement, and better detail retention. Best when you want the most polished result.
Below the mode tabs: the model list
Under the Basic / Professional tabs, you’ll find the full lineup of available models. Each one has its own icon, name, and a set of capability tags (like Multi-Image Reference, Video Reference, Audio, or HD) so you can see at a glance what it’s best suited for.

We currently offer six models, each with its own strengths. We’ll walk through all of them in the next section.
Duration
Choose how long your clip should be. Depending on the model you’ve selected, you can generate anywhere from 5 seconds up to 15 seconds (with 15s output exclusive to the v4.0 Preview series).


Show a Demo

A pre-made example we’ve put together for each model to showcase what it’s capable of.
❗️These aren’t live samples from other users or your own generations — they’re curated demonstrations designed to help you understand each model’s strengths before you commit credits to your own run. Great for comparing styles or finding inspiration when you’re not sure where to start.
Top Right: Content Mode
In the top-right corner of the page, a dropdown lets you set the content mode for your generation — be sure to choose the one that fits the work you’re creating.
Professional Mode is reserved for Plus members and above. Upgrade now to unlock it and enjoy more creative freedom.

The Model Lineup: Which One Should You Pick?
If you just want a quick decision guide:
- V4.0 Preview : flagship next-gen model, supports multi-image & video references, up to 15-second output
- V4.0 Lite Preview: the more affordable v4.0 experience, ideal for everyday creation
- V3.2: most polished, best prompt adherence, supports audio
- V3.0 (High Consistency): best at keeping character and style stable
- V3.0 (Flash): fastest generation, great for iteration
- V2.7 (High Dynamics): best for cinematic motion + camera-driven feel
| Feature | V4.0 Preview | V4.0 Lite Preview | V3.2 | V3.0 (High Consistency) | V3.0 (Flash) | V2.7 (High Dynamics) |
| Motion Quality | ✅ Top-tier, highly refined | ✅ Great everyday quality | ✅ Natural, expressive | ✅ Stable, controlled (can feel a bit stiff) | ⚠️ OK for simple motion; big actions may need retries | ✅ High-energy, cinematic |
| Camera Control | ✅ Fine-grained cinematic control | ✅ Solid cinematic feel | ✅ Cinematic (model-driven) | ⚠️ Works, but can be rigid | — Basic | ✅ Dedicated camera dropdown |
| Prompt Adherence | ✅ Very strong | ✅ Strong | ✅ Strong | ✅ Very strict (even if it looks unnatural) | ⚠️ Needs clear, precise wording | ⚠️ Medium (prioritizes visuals) |
| Consistency | ✅ Excellent across frames | ✅ Great | ✅ Smooth transitions, solid logic | ✅ Best character/style stability | ⚠️ Acceptable for quick runs | ⚠️ Good, but may drift in complex scenes |
| Max Duration | ✅ Up to 15 s | ✅ Up to 15 s | 5 / 10s | 5 / 10s | 5 / 10s | 5 / 10s |
| Reference Inputs | ✅ Multi-Image + Video Reference | ✅ Multi-Image + Video Reference | Start / End Frame | Start / End Frame | Start / End Frame | Start Frame only |
| Speed | Medium | Fast | Fast | Medium | Fastest | Faster |
| Special / Unique | 🆕 Multi-Reference mode, 15s output | 🆕 Same capabilities at lower cost | 🎙️ Audio generation | 💃 Dance Presets | ⚡ Fastest speed | 🎥 Camera Movement dropdown |
| Best For | Ambitious, high-quality projects with precise control | Everyday creation, concept exploration at lower cost | Story clips, talking portraits, audio-driven scenes | Locking in character & style | Drafts, iteration, rapid testing | Dramatic shots, cinematic motion |
Choosing the right model is 90% of the battle. Here is the breakdown of our current 6-model roster:
V4.0 Preview — The Next-Generation Flagship

V4.0 Preview is the most advanced Image-to-Video model we’ve ever released, and it’s where we’re focusing our most ambitious creative capabilities.
It brings together a major leap in motion quality, camera control, and scene consistency — built for creators who want the most polished, cinematic results PixAI can deliver.
What makes V4.0 Preview stand out:
- Smoother, more believable motion with stronger physical behavior and fluid frame-to-frame transitions
- More reliable performance on demanding scenes — challenging actions and sustained motion hold up better
- Fine-grained camera control for shots with real directional intent
- Richer creative interpretation — the model fills in gaps thoughtfully, turning simple ideas into fuller scenes
- Greater visual consistency across characters, style, and scene details
🌟 Multi-Reference (v4.0 Preview Exclusive)
Exclusive to the v4.0 Preview series, this button lets you switch between different ways of guiding your generation. Click it to open the dropdown and choose the mode that fits your creative approach:

Upload multiple reference images, or a reference video, to shape the look, composition, and motion of your result with far more precision.
Bonus feature: Add Audio
- Add Audio ON (default): pick a language, then type what you want the character to say directly in the prompt box. The model generates the voiceover and syncs it into the video.
- SE Only: sound effects only — no spoken lines, but you’ll still get contextual audio.
- Add Audio OFF: completely silent output (no voice, no effects).

Best for: ambitious projects, cinematic storytelling, precise creative control, and anyone chasing top-tier output quality.
💡 Note: As a Preview model, some content types aren’t supported yet. If a generation doesn’t work, try adjusting your prompt or swapping reference materials.
V4.0 Lite Preview — The Everyday v4.0

V4.0 Lite Preview brings the v4.0 generation to a more accessible price point. It’s designed for creators who want the quality leap of the v4.0 series without committing extra credits on every run — making it a great everyday choice for concept exploration and regular creative work.
Under the hood, it shares the same core capabilities as V4.0 Preview, including the flagship features:
- 🖼️ Multi-Image Reference
- 🎞️ Video Reference
- ⏱️ Up to 15 seconds of video
Best for: everyday creation, idea exploration, iterating with the new v4.0 toolkit, and anyone who wants the v4.0 feature set at a gentler cost per generation.
V3.2 — The Narrative Powerhouse (With Audio!)

With V3.2, your clips can include spoken dialogue (voiceover) and/or scene-appropriate sound effects — making it the only model in the lineup with built-in audio generation.
Beyond audio, V3.2 generally follows prompts more closely, which translates to fewer “why did it do that?” moments. Motion also feels more intentional: smoother transitions, cleaner camera flow, and a more film-like finish overall.
Best for: story-driven clips, higher prompt accuracy, more polished motion, and any time you want voice or sound.
v3.0 (High Consistency): The Character Anchor

If you’ve ever generated a clip where the character starts moving and suddenly the face shifts, the outfit morphs, or the style drifts—V3.0 (High Consistency) is built to fight that.
Its strength is stability: it does a strong job keeping your character design and overall look locked in, even when motion gets more intense.
Best for: character consistency, style stability, and quick, reliable short clips (especially dances).
Bonus feature: Action Presets
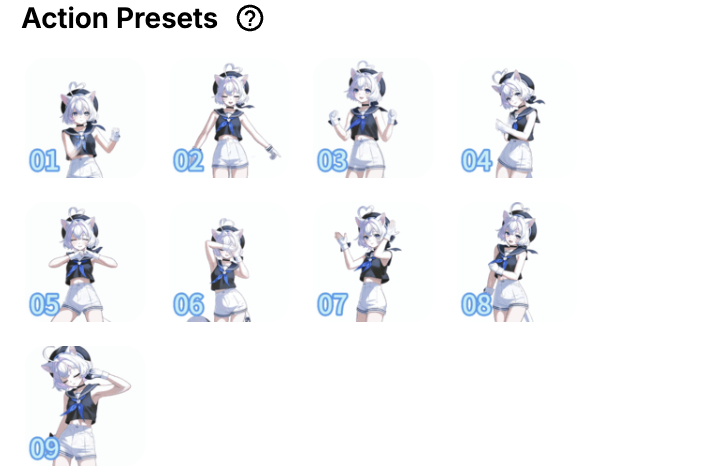
V3.0 (High Consistency) includes 9 action presets, so you can generate trendy dance-style videos without describing choreography. It’s a simple workflow: pick a dance, generate, done.
v3.0 Flash— Speed for Creators Who Iterate Fast

V3.0 Flash is built for speed and cost efficiency.
There aren’t special, model-only settings to manage, which makes it easy to use. If you iterate a lot, test variations, or just want solid results quickly without spending extra credits, Flash is a great default.
Best for: drafts, exploration, rapid testing, and fast turnaround.
v2.7 (High Dynamics): Cinematic Motion
If V3.0 is your stability model, V2.7 (High Dynamics) is the cinematic one.
It’s designed for more dramatic movement: stronger depth, more energetic motion, and a “the camera is doing something” look. It also handles complex scenes well, and can often deliver dynamic results even with relatively simple prompts.
Best for: cinematic motion, energetic clips, and users who want camera control without prompt complexity.
Bonus feature: Camera controls

V2.7 has a dedicated Camera setting that’s unique to this model. Instead of writing camera directions into your prompt, you can select movement directly from the dropdown (for example, horizontal or vertical pans). Once you choose a camera move, you can keep your prompt focused on the scene and action—the model handles the cinematography.
Mastering Prompt Writing
Now for the most critical part – writing prompts that actually work. Instead of just giving you examples, we’ll explain the why behind each technique so you can create your own effective prompts.
A great prompt usually follows this structure:
Prompt = Subject + Motion + Environment
Let’s break down each layer starting with your anchor point:
Layer 1: Subject Definition
Since you’re working with image-to-video, the subject already exists visually — so you don’t need overly detailed character descriptions. But it’s still important to include a general description of your subject in the prompt. Why? Because this helps the model lock in visual anchors like hair, outfit, or facial features—especially for maintaining consistency during motion.
Example: “A white-haired girl with cat ears and violet eyes”
Each descriptor gives the AI specific features to track and maintain throughout the animation.
Layer 2: Motion Specification
This is the soul of your animation. You’re telling the model what the subject is doing, so you need to be specific and intentional. Always tie the motion back to the subject. Why does this matter? Because it gives the model a clear action to animate—and how to animate it.
✅ Good example:
“The white-haired girl gently adjusts her bangs with one hand, tilting her head slightly”
Avoid vague motion like:
“She moves around”
Instead, write:
“She slowly leans forward to pet the cat on her lap, her expression softening as the cat purrs.”
Tips:
- Use verbs that imply motion and style (e.g., “leaps gracefully,” “glances quickly,” “twirls with hesitation”)
- Avoid abstract terms like “moves” or “interacts” on their own
- Combine physical action with emotional nuance or timing
Layer 3: Environmental Context
The model also needs to know where the subject is — this helps it apply the correct lighting, reflections, atmosphere, and even physics (like wind or particles).
✅ Good example:
“Sitting on a wooden classroom desk bathed in afternoon sunlight, dust particles dancing in the golden light”
Or:
“Standing beside a misty lake at dawn, soft light reflecting on the water’s surface”
This helps the model simulate lighting, atmosphere, and background interactions.
Layer 4: Camera Movement(Optional)
Want a cinematic effect? Add camera control. But be realistic—many models only support basic movement while advanced movement is better supported by v3.1, v3.0 or v2.7.
Prompt = Camera movement + Subject + Motion + Environment + Camera language
Camera prompts tell the AI how to frame and move through the scene. When writing these, think like a director – describe how you want the camera to physically navigate the space, whether that’s gliding forward, tilting up, or panning across. Keep timing in mind, avoid overly complex choreography so the AI can execute it cleanly. Most importantly, place your camera command right where the movement happens in your scene description – for example: ‘Camera slowly pushes in through the crowd toward the girl, transitioning into an over-the-shoulder shot as she gazes up at the departures board.’ – so the AI understands precisely when and how to execute the move without getting confused.
CAMERA MOVEMENT ARSENAL
| Movement Type | Prompt Syntax | Best Use Case |
| Push In | “camera slowly pushes in from [wide/medium] to [medium/close-up]” | Emotional reveals |
| Pull Back | “camera pulls back to reveal [context/environment]” | Context establishment |
| Pan Left/Right | “camera pans smoothly from left to right across the scene” | Landscape reveals |
| Tilt Up/Down | “camera tilts up from [feet/ground] to [face/sky]” | Character introduction |
| Orbit | “camera orbits around the subject in a [clockwise/counter-clockwise] motion” | Dynamic character showcase |
| Track | “camera tracks alongside as [subject] moves [direction]” | Following action |
| Crane | “camera cranes up from ground level to bird’s eye view” | Dramatic scale change |
| Dolly | “smooth dolly shot moving [forward/backward] while maintaining focus” | Cinematic approach |
Wrap Up
And that’s the full walkthrough! From picking the right engine—like the narrative-heavy V3.2 or the rock-solid V3.0 High Consistency—to layering your prompts like a pro, you now have the blueprint for high-tier AI video.
Related Topics


